Step 1
Insert the Micro SD card in to the camera. The method may vary depending on the type of camera.


Step 2
Using an internet browser similar to that of Chrome or Firefox, go to www.ivideon.com and Sign in to your Ivideon account with your ID and password.
Step 3
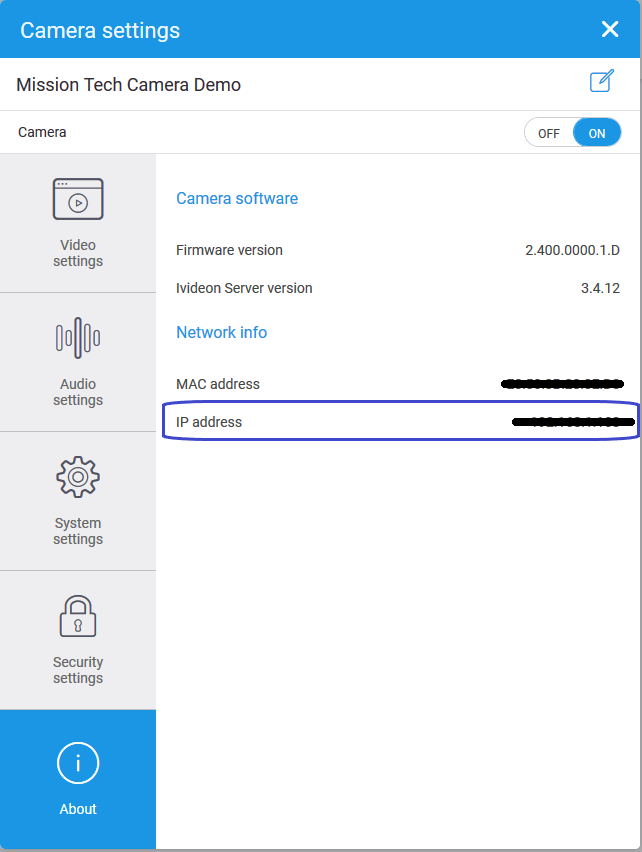
Go to Camera settings.

Step 4
In Camera settings select About and take a note of the IP address of your camera

Step 5
Ivideon will randomly set up a password for your cloud camera when it is linked your Ivideon account. Select Security Settings and setup your new password.

Step 6
Open a Web Browser using your computer, tablet or mobile phone and type in the IP address of your camera into the address bar to log in to your cloud CCTV camera

Step 7
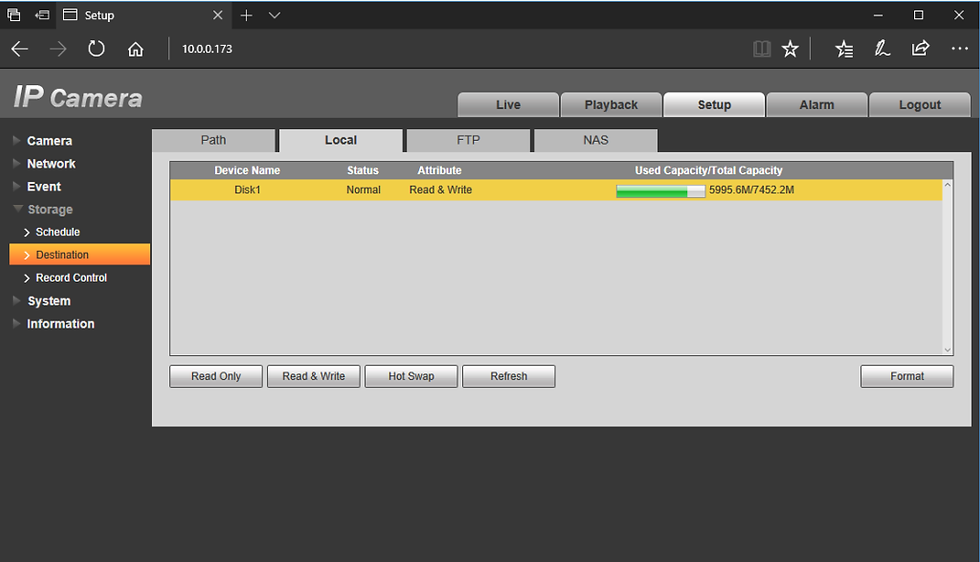
Select the options in the following order:
Setup
Storage
Destination
Local

If you see green on the Used Capacity/Total Capacity storage bar, then your Micro SD card is setup correctly. Otherwise, select Disk1 and select Format to format the card.
The camera will restart after it has formatted the card. Repeat Step 7 to ensure that your Micro SD card is setup correctly.

Comments